What is an "Applied absence"?
In Beam, when you need to register a leave or absence that affects an employee over a period of several days (for example, a sick leave, a sabbatical, or any other extended absence), there are two ways to apply it:
- By approving a request generated by the employee themselves from their Beam mobile app.
- By entering it directly from the calendar, by selecting a specific shift and the end date of the period. We specifically call this process "Applied absence", and unlike an employee request, this type of entry can only have the status "Approved" (it doesn't go through a validation flow, since it's the Manager themselves who enters it).
In both cases, the information is recorded in the request details.
Why is this useful?
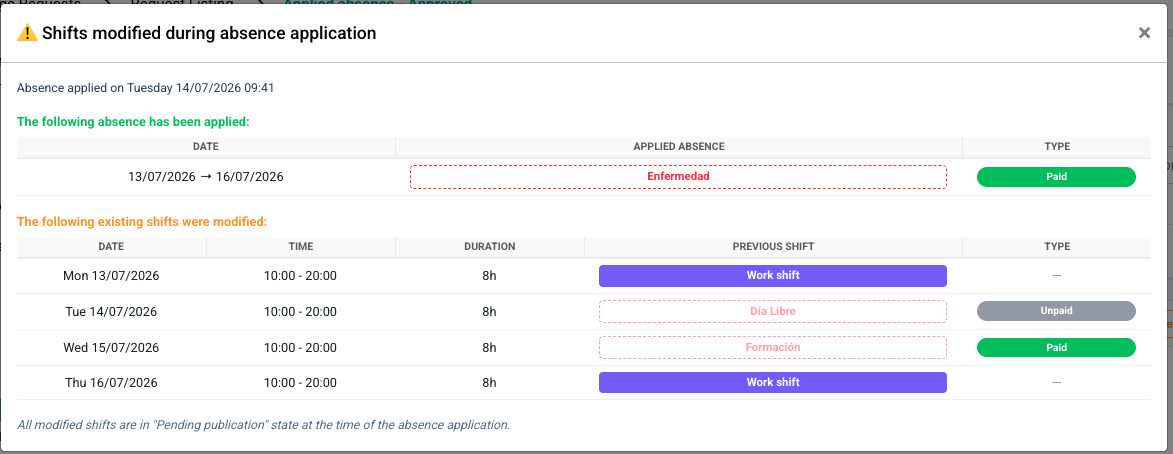
When an absence is applied over a long period — whether through approving a request or directly from the calendar — it's common for that period to include shifts that were already scheduled with other reasons that don't count as working time (for example, days off or rest days). To avoid confusion about what happens to these shifts, Beam now shows a clear summary of all affected shifts before confirming the change.
? Important note: absence shifts that don't count as working time (days off, rest days, etc.) that were previously scheduled are automatically converted into shifts with the applied absence reason. However, even if this absence reason does count as working time, the hours of these converted shifts are not counted as effective working time.
How to apply an absence
Option 1: By approving an employee request
- The employee generates the absence request from their Beam mobile app, indicating the corresponding period.
- As a Manager, you access the pending request and review it, either from the mobile app or the Beam desktop app.
- You confirm the approval.
- Once approved, Beam displays a window with a summary of the shifts that will be affected by the change over that period.
Option 2: By entering the absence directly from the calendar
- Access the relevant calendar.
- Select the specific shift from which you want to apply the absence.
- Choose the corresponding absence reason.
- Select the end date of the absence period.
- Confirm the application of the absence.
- Beam displays a window with a summary of the shifts that will be affected by the change. Review this information before confirming.
Where can I check this information afterwards?
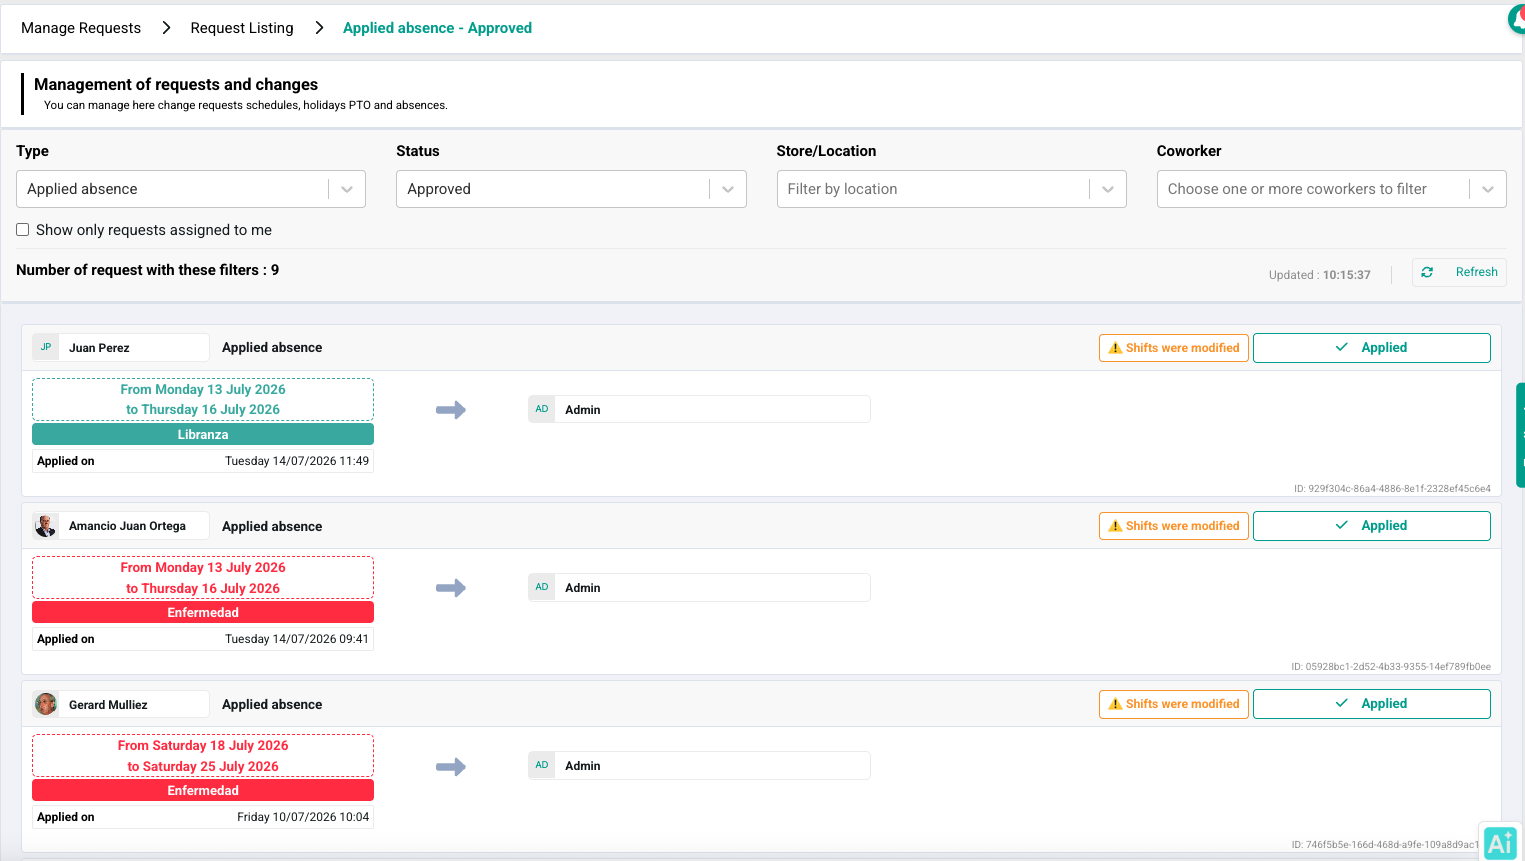
For an absence applied from the calendar, you'll find the record in the request details. If it was entered directly from the calendar, it will appear identified as "Applied absence" (only the "Approved" status exists in this case).
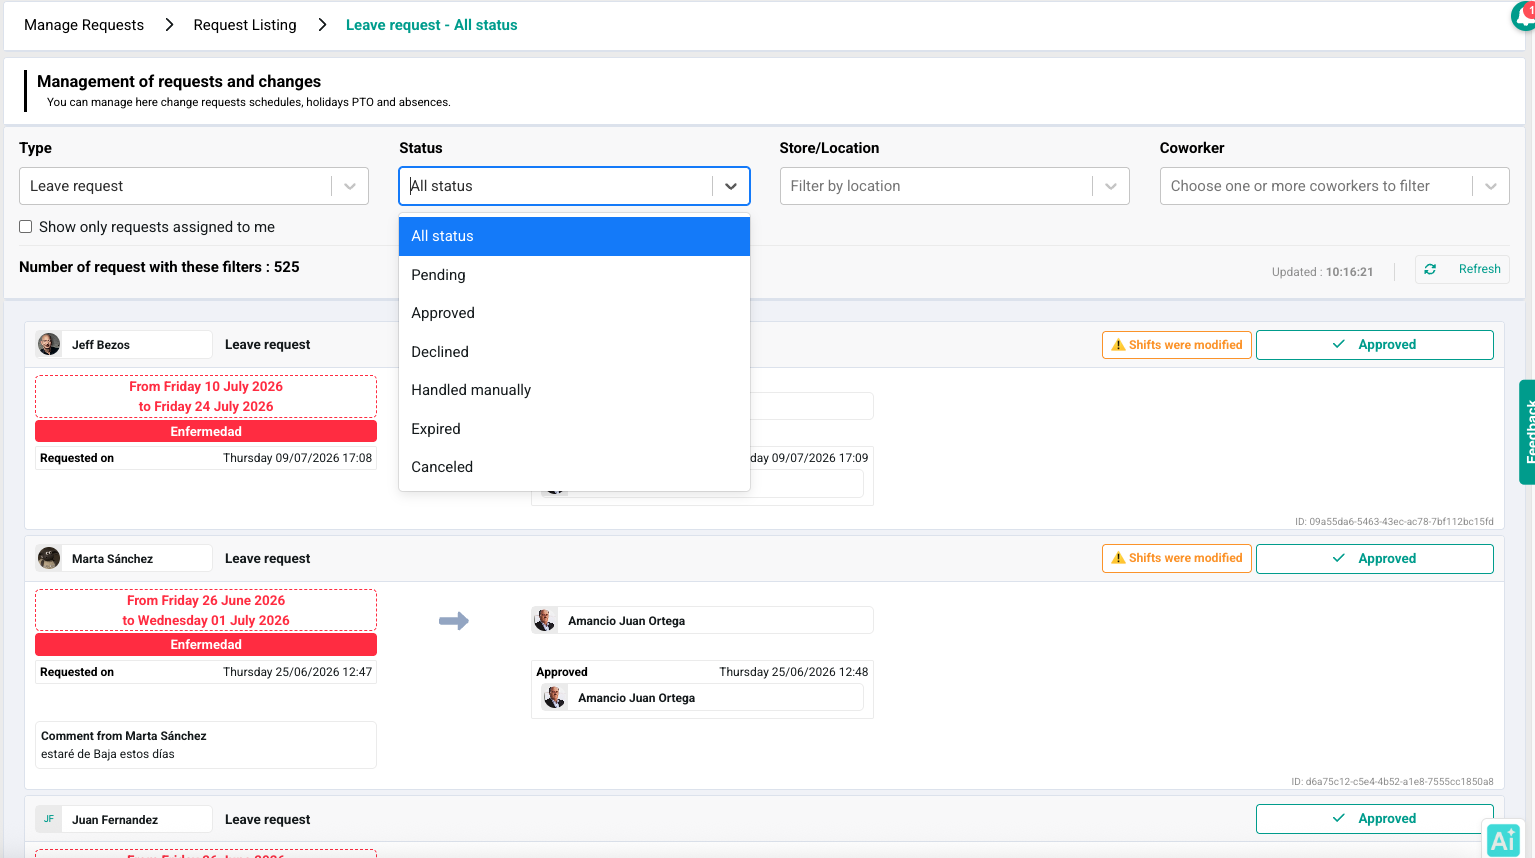
If it's an employee request, go to Request Management → Absence requests. In this case, several statuses are possible: pending, approved, rejected, expired, cancelled.
NOTE: you can also manage and consult requests received on your mobile application.
Was this article helpful?
That’s Great!
Thank you for your feedback
Sorry! We couldn't be helpful
Thank you for your feedback
Feedback sent
We appreciate your effort and will try to fix the article